
Wednesday, June 20, 2012
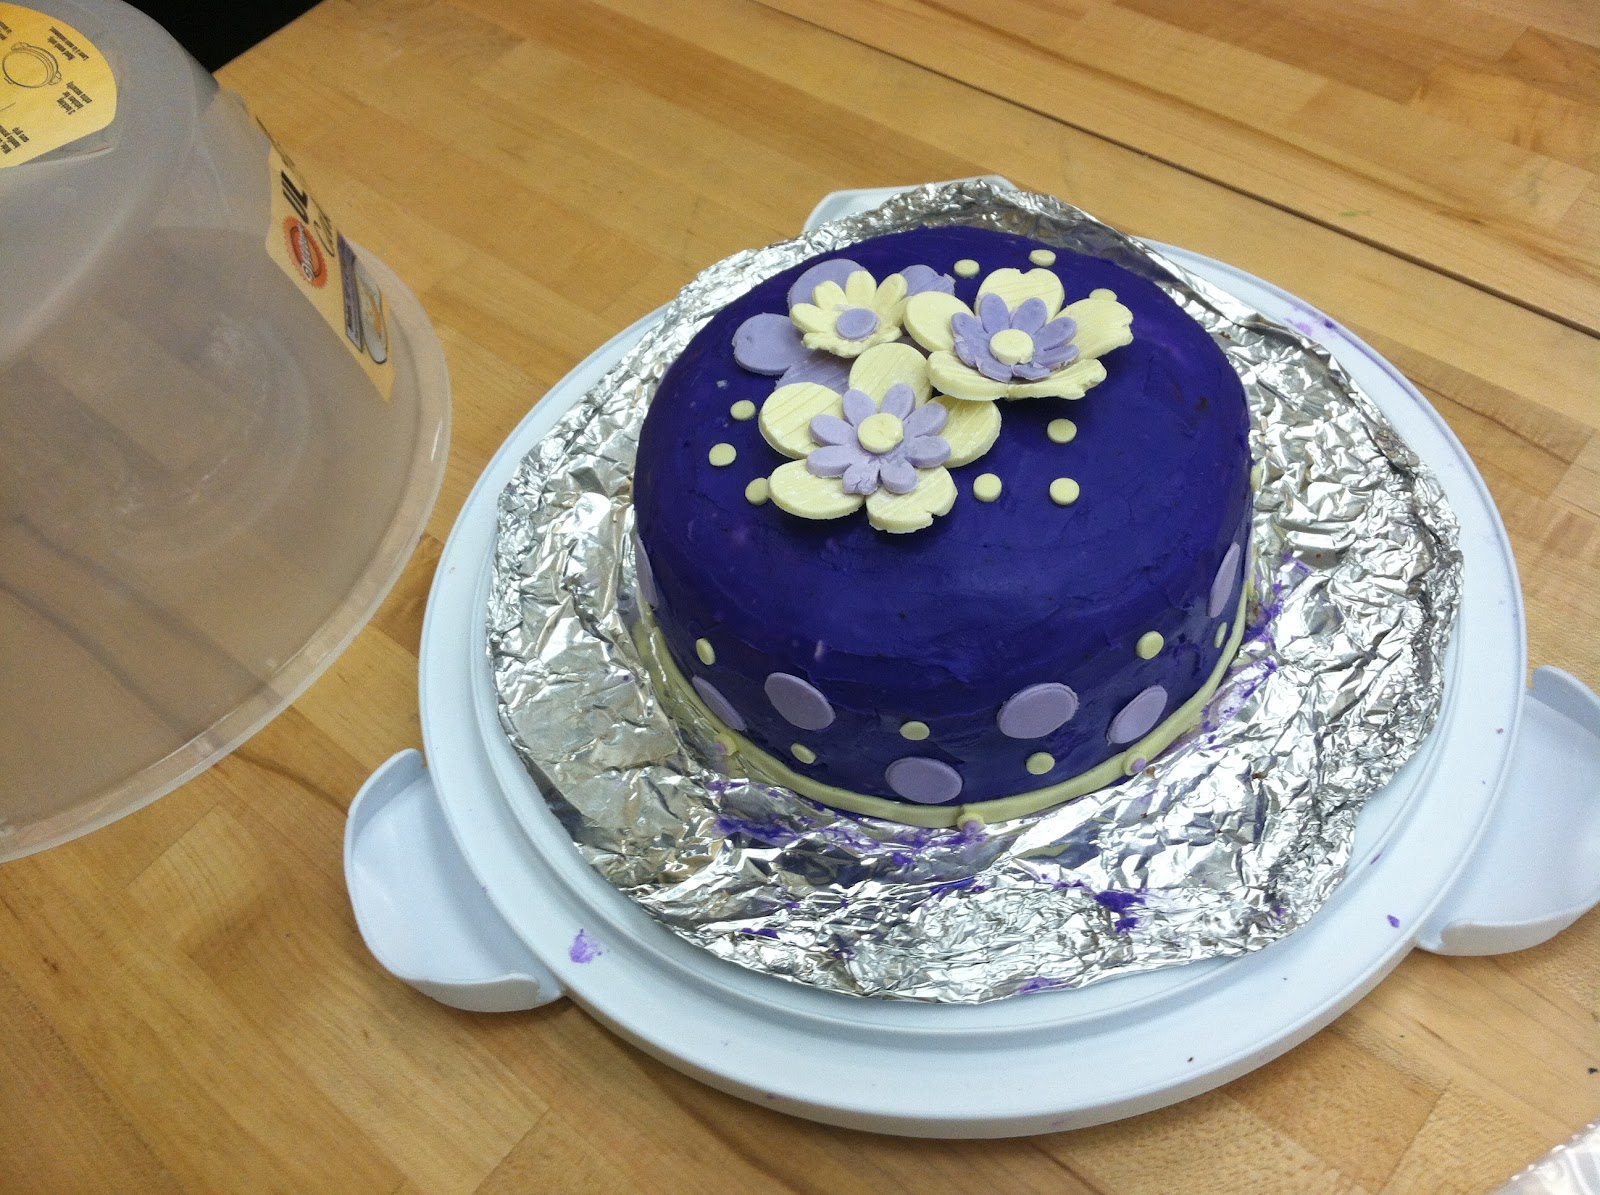
Gift Box Cake
Wednesday, June 13, 2012
Louis Vuitton Purse Cake
So I decided to go ahead and take on the task of my first purse cake...and I'm actually please with how it turned out! But let me say, it wasn't exactly a "cake walk".

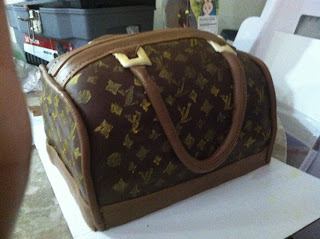


 Chocolate Fondant was a perfect color match (but note: I did find that the Wilton chocolate fondant was drier than white/colored fondant). When I covered the cake, the fondant on both ends wrinkled so I had to cut the ends off and roll out separate pieces to attach to the end. This really wasn't noticeable on the finished product since I put "fondant piping" on the two ends of the purse anyway. I still need to work on covering square objects with fondant because the corners of the cake continue to be an issue for me.


I think that the most difficult part of this cake, was trying to stencil the Louis Vuitton pattern especially because I didn't have an actual stencil. After doing some research online, I saw that you can purchase one but I didn't have a few weeks to wait for it to come via mail and I couldn't find a stencil at any local store. Soooo I pretty much had to make one myself.


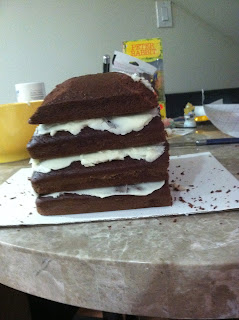
I created the purse shape by baking two 9x13" cakes and cutting them in half to create four layers, this pretty much created the height and width of a real purse. I then filled the cake with buttercream, and carved the top layer to create more a of rounded shape...


I then laid my stencil on the cake and painted on the Louis pattern using Yellow Pearl dust mixed with water, the pattern isn't perfect...but I'm sure you get the jist of it.

I mixed white, yellow, and the chocolate fondant to create a "tan" color which I used for the piping and zipper part of the purse. I rolled out some fondant to create handles and attached them to the side of the cake using gum paste glue, but I had to lighten up my handles since my first ones were thick and just too heavy to hang off the side of the cake. And Voila!!
 |
| Finished Louie Vuitton Purse Cake!! |
Monday, June 4, 2012
cake central
Ever check out Cake Central? I'd definitely recommend as a resource for cake tips and project inspiration. The site is a central location for everything cake from recipes, to ideas, to articles...and I've been browsing thorough lately looking for project ideas. Check it out! cakecentral.com
Saturday, June 2, 2012
Cake Orders


Baseball Cap Cake


I had bought a Wilton sports ball pan and wanted to try out the baseball cap cake. I used a 6 inch pan and one half of the sports ball pan to create the dome part of the cake, and I filled the cake with buttercream. I actually found this cake to be pretty simple, just a lot of detailing needed to be done (but that's my favorite part anyway).
Creating the Cake
After filling and frosting the cake I colored my Fondant to get as close to the "Yankees blue" as possible. I covered the cake in Fondant, and cut the Yankee logo out of Fondant as well (just traced it from an image I found on the internet). I also found an image of the MLB logo on the back of the hat and did my best to draw that by hand. Using a paintbrush and some gel food coloring I painted the Logo half blue and half red like the real thing.
Prior to putting these pieces on the cake I had to do the hat stitching. I had read online that Wilton sells a "stitching tool" but I couldn't find that in any stores, so i created the "stitching" using the end of a crocodile clip because it had the perfect half moon shape. It was important to keep a steady hand though. To create the "vent holes" in the top of the cap I rolled six small balls of fondant, flattened them between my fingers, and pressed the end of the skinny paintbrush into them. All extra pieces were attached to the cake using gum paste glue (real easy to make...put a piece of gum paste into a shallow bowl of water).
For the hat brim, I traced the brim of a real hat onto wax paper and then cut the brim out of fondant using the wax paper template. It was also important to use the empty half of the sports ball pan to make sure the brim would fit securely to the edges of the round cake. I saw some recommendations online that you let the brim dry a few days in advance to create "bended brim look" but I was going for more of a fitted hat look and I think it came out just fine. Although I attached the brim using gum paste glue, I wouldn't recommend doing that because it created a glossy line where the brim attached and since it is made of fondant it wasn't really going anywhere anyway. I then used the same tool to create three lines of stitching along the brim. I found it so helpful to look at an online image of a baseball cap while I was working on this cake, and Im sure it would be even easier if you have a baseball cap lying around the house.
Friday, June 1, 2012
Break into cake decorating, even if you are on a budget


cake decorating debut!
So, I've always really enjoyed art and can't say that I was much of a baker (or better yet I guess I just didn't think it would ever become a hobby of mine). Something about cake decorating really caught my interest because the thought of molding and shaping cakes to look like objects just fascinated me! I started doing all the research I possibly could and ended up taking Wilton Cake Decorating classes at the local Michael's crafts store (really cheap fyi! A great way to learn all the techniques on a budget...four class sessions are only about $25). It took me four months to complete the four different levels offered by Wilton, and I can honestly say that I have a solid knowledge of cake decorating from baking/frosting/filling a cake to creating almost any gum paste flower under the sun. Nevermind the fact that I've also now accumulated so many supplies I don't even know where to store them. Now that I've laid the foundation I'm starting on my own, making custom cakes and practicing techniques...and might as well share my journey and what I pick up along the way!
Check out the Michael's link if you are interested in learning cake decorating on a budget...and when I say "budget" I mean budget price...not budget quality...the instruction was fantastic and I met a lot of great people...
http://www.michaels.com/Exciting-Classes/classes,default,pg.html
Check out the Michael's link if you are interested in learning cake decorating on a budget...and when I say "budget" I mean budget price...not budget quality...the instruction was fantastic and I met a lot of great people...
http://www.michaels.com/Exciting-Classes/classes,default,pg.html
Subscribe to:
Posts (Atom)